Getting Started with KitQL and GraphCMS
KitQL is a GraphQL client for Svelte. It is a set of tools to help you query GraphQL APIs. I’ve been using it in a couple of projects now and want to share what I have learned. What better way to do that than the (now) classic re-reaction of the GraphCMS blog template with SvelteKit.
First up I want to thank the creator of KitQL for his work. Jean-Yves Couët (or JYC) has done a great job with KitQL and the additional tooling he’s created for use in SvelteKit.
He’s also done a great introductory video over on YouTube with an explanation video for setting up KitQL. The API has changed a bit since the video so I’ll go over how to use that here.
What’s in the box?
KitQL uses the GraphQL Code Generator to generate typed queries, mutations and subscriptions. This means that you can use the built in VS Code intellisense to find fields in queries.
Let’s get set up!
If you haven’t got the GraphQL VS Code extension mentioned in JYC’s video installed go install that for the ability to run queries in VS Code.
I have a couple of other projects with this naming convention x-with-sveltekit-and-graphcms where x is the GraphQL client being
used. So the projects are identical bar the client used and in this
case with KitQL being a TypeScript tool I’ll be using TypeScript in
place of JavaScript.
Create a new project
I’ll start by creating the project with the npm init command and
pick the following options:
➜ npm init svelte@next kitql-with-sveltekit-and-graphcms

✔ Which Svelte app template? › Skeleton project
✔ Use TypeScript? … Yes
✔ Add ESLint for code linting? … Yes
✔ Add Prettier for code formatting? … Yes
✔ Add Playwright for browser testing? … Yes
I’ll follow the rest of the steps from the CLI output to get set up!
Next steps:
  1: cd kitql-with-sveltekit-and-graphcms
  2: npm install (or pnpm install, etc)
  3: git init && git add -A && git commit -m "Initial commit" (optional)
  4: npm run dev -- --open
I’m using pnpm in these examples.
Create a .env file for my GraphCMS content API endpoint.
touch .envIn the .env file I’ll create a VITE_ environment variable for the
GraphCMS content API endpoint:
VITE_GRAPHQL_API=https://api.graphcms.com/v2/projectid/masterInstall dependencies and configure
Then I’ll need to install KitQL and the JavaScript implementation of GraphQL.
pnpm i -D @kitql/all-in graphqlCreate a .graphqlrc.yaml file:
touch .graphqlrc.yamlI’ve taken the config for the file here from the KitQL all-in docs.
To be able to do code gen on this there needs to be a schema for use
in the .graphqlrc.yaml file. The schema can be either a local file
or a remote URL, I’m pointing this to the public content API of the
GraphCMS blog template.
projects:
  default:
    schema: https://api.graphcms.com/v2/projectid/master
    documents:
      - '**/*.gql'
    extensions:
      endpoints:
        default:
          url: https://api.graphcms.com/v2/projectid/master
      codegen:
        generates:
          ./src/lib/graphql/_kitql/graphqlTypes.ts:
            plugins:
              - typescript
              - typescript-operations
              - typed-document-node
              - typescript-document-nodes

          ./src/lib/graphql/_kitql/graphqlStores.ts:
            plugins:
              - '@kitql/graphql-codegen'
            config:
              importBaseTypesFrom: $lib/graphql/_kitql/graphqlTypes

        config:
          useTypeImports: true
You may be thinking, wait, why is the content API hardcoded in here?
If you watched JYC’s video you would have seen him take the schema
from the browser network tab and put in into a local schema.json file.
I won’t be committing the API endpoints to git as I don’t really want
to be adding them to a public repo. Even though the is publicly
accessible. I’ll replace the schema and url properties with ${VITE_GRAPHQL_API} before I commit the file to git.
There’s then the sveltekit.config.js file. In here I’ll need to add
and configure the vite-plugin-watch-and-run, take note here if
you’re not using pnpm you may want to change the run command.
This plugin is really handy, with this configuration it will watch for
any changes to GraphQL files and then run the gen, package.json script.
import watchAndRun from '@kitql/vite-plugin-watch-and-run'
import adapter from '@sveltejs/adapter-auto'
import preprocess from 'svelte-preprocess'

/** @type {import('@sveltejs/kit').Config} */
const config = {
  // Consult https://github.com/sveltejs/svelte-preprocess
  // for more information about preprocessors
  preprocess: preprocess(),

  kit: {
    adapter: adapter(),
    vite: {
      plugins: [
        watchAndRun([
          {
            watch: '**/*.(gql|graphql)',
            run: 'pnpm run gen',
          },
        ]),
      ],
    },
  },
}

export default config
Now that pnpm run gen is added to vite-plugin-watch-and-run and
being called each time there’s a change to any GraphQL files, I’ll
need to add it to the scripts in the package.json file.
"scripts": {
  "prepare": "pnpm run gen",
  "dev": "svelte-kit dev --port 3777",
  "gen": "graphql-codegen --config ./.graphqlrc.yaml",
},
Because I’m using pnpm I’ll also need to amend the .npmrc file:
-engine-strict=true
+save-exact=true
+node-linker=hoisted
Alright! Nearly done!
If I run the dev script (pnpm run dev) command now (which will call
the gen script with vite-plugin-watch-and-run) I’ll get some error
output from graphql-codegen because I’ve not created any GraphQL
queries!
I’ll create that folder structure now, note the -p flag will create
parent folders as well. So this command creates the lib, graphql and _kitql folders.
mkdir src/lib/graphql/_kitql -pIn the src/lib/graphql folder I’ll create an all-posts.gql file:
touch src/lib/graphql/all-posts.gqlthis is to list all the posts in the blog on the index page:
query AllPosts {
  posts {
    title
    slug
    date
    excerpt
    tags
    coverImage {
      url(
        transformation: {
          image: { resize: { fit: clip, height: 369, width: 656 } }
        }
      )
    }
  }
}
Now with the dev script running vite-plugin-watch-and-run will do
it’s thing and run the gen script. This creates the graphqlStores.ts and graphqlTypes.ts files in the _kitql folder.
Taking a look at the graphqlStores.ts file now I can see that there
is a function for KQL_AllPostsStore() which exports KQL_AllPosts.
The function has all the methods on it I’ll need for working with the data.
Additional config for Tailwind
The rest of the code examples will be using Tailwind. If you’re following along and you’re not into Tailwind you can skip this bit.
Don’t like Tailwind? That’s cool, you do you. 😊 It’s not relevant to this example, really. I do want this to be a guide you can follow to have the same result as what I have put on GitHub. If you only want to check out the code there’s a link at the end of the post. 👍
# install and config tailwind
npx svelte-add@latest tailwindcss
# add typography and daisyUI
pnpm i -D @tailwindcss/typography daisyui
The Typography and daisyUI plugins are added to the tailwind.config.cjs file:
const config = {
  content: ['./src/**/*.{html,js,svelte,ts}'],

  theme: {
    extend: {
      typography: {
        DEFAULT: {
          css: {
            maxWidth: null,
          },
        },
      },
    },
  },

  plugins: [require('@tailwindcss/typography'), require('daisyui')],
}

module.exports = config
Create KitQL client
Now I can create the KitQL client to start querying data. Create the .ts file for it first:
touch src/lib/graphql/kitQLClient.tsThen I’ll add the following configuration to the kitQLClient.ts file:
import { KitQLClient } from '@kitql/client'
const GRAPHQL_ENDPOINT = import.meta.env.VITE_GRAPHQL_API

export const kitQLClient = new KitQLClient({
  url: GRAPHQL_ENDPOINT as string,
  credentials: 'omit',
  headersContentType: 'application/json',
  logType: ['client', 'server', 'operationAndvariables'],
})
Use queried data from graphqlStores
Now for the home page (src/routes/index.svelte) I can use the KQL_AllPosts store and use the queryLoad method.
You may notice there’s two types of query you can use on the store,
there’s a query and a queryLoad method that are on the store.
queryLoad is intended for use in a SvelteKit load function whereas
with the query is non blocking and can be used in components and
pages.
In a SvelteKit load function I can await the query for AllPosts and return an empty object from the load function. It’s empty because
once the data has been fetched before the page loads it’s added to a
Svelte store for use in the page.
<script lang="ts" context="module">
  import { KQL_AllPosts } from '$lib/graphql/_kitql/graphqlStores'

  export const load = async ({ fetch }) => {
    await KQL_AllPosts.queryLoad({ fetch })
    return {}
  }
</script>
Once the page has loaded I can subscribe (referencing the store value
with the $ ) to the KQL_AllPosts store to get the data.
<script lang="ts">
  let posts = $KQL_AllPosts.data?.posts
</script>
I can now use that in a Svelte each expression to render the posts. This is with Tailwind and daisyUI classes.
{#each posts as { title, slug, excerpt, coverImage, tags }}
<div class="card text-center shadow-2xl mb-20">
<figure class="">
<img
class=""
src={coverImage.url}
alt={`Cover image for ${title}`}
/>
</figure>
<div class="card-body prose">
<h2 class="title">{title}</h2>
<p>{excerpt}</p>
<div class="flex justify-center mb-5 space-x-2">
{#each tags as tag}
<span class="badge badge-primary">{tag}</span>
{/each}
</div>
<div class="justify-center card-actions">
<a
sveltekit:prefetch
href={`/posts/${slug}`}
class="btn btn-outline btn-primary">Read ⇒</a
>
</div>
</div>
</div>
{/each}Sweet! That’s the index page rendering out all the posts!
I’ll now concentrate on creating the src/routes/posts/[slug].svelte file so clicking the link on the index page will take you to that
post.
Passing GraphQL variables
So, clicking a link on the index page will give a 404 because the
route for it doesn’t exist yet. That page is going to need the
specific data for that post. So I’m going to want to create a GraphQL
query for that post passing in the ${slug} as a variable to query
on.
I’ll make the query file first, via bash:
touch src/lib/graphql/get-post.gqlThen I’ll add the following to the get-post.gql file:
query GetPost($slug: String!) {
  post(where: { slug: $slug }) {
    title
    date
    tags
    author {
      name
      authorTitle: title
      picture {
        url(
          transformation: {
            image: { resize: { fit: clip, height: 50, width: 50 } }
          }
        )
      }
    }
    content {
      html
    }
    coverImage {
      url
    }
  }
}
Now I’ve created that query, vite-plugin-watch-and-run will do it’s
thing (as I have the dev server running) and generate the store and
types for that query.
This query is expecting the $slug variable, I’ll need to get that
from the context in the load function of the [slug].svelte file.
Which doesn’t exist yet.
Soooo, another bash command or two to create the folder and file for the posts route.
# make the posts folder
mkdir src/routes/posts
# create the /posts/[slug].svelte file
touch src/routes/posts/'[slug]'.svelte
I’ll break down the several parts of the posts/[slug].svelte file
here, so first up I’ll need to get that slug variable from the context in the load function of the [slug].svelte file. I’ll just
go straight in here and destructure the params object (which has the slug value) and also destructure fetch for KitQL to use:
<script lang="ts" context="module">
  import { KQL_GetPost } from '$lib/graphql/_kitql/graphqlStores'

  export const load = async ({ params, fetch }) => {
    const { slug } = params
    if (slug)
      await KQL_GetPost.queryLoad({ fetch, variables: { slug } })
    return {}
  }
</script>
I’m importing the KQL_GetPost store here, and then I’m calling the .queryLoad passing in the fetch and variables object.
Using context="module" means that code will run before the page
loads.
When the page loads I will be able to subscribe to the KQL_GetPost store in some <script> tags and get the data I need out of the store
to use in the page.
<script lang="ts">
  let post = $KQL_GetPost.data?.post
  const {
    title,
    date,
    tags,
    author: { name, authorTitle, picture },
    content: { html },
    coverImage,
  } = post
</script>
⚠️ code wall incoming! ⚠️
So now I have all I need to render out the post from the KQL_GetPost store.
Here’s what the rest of the posts/[slug].svelte file looks like:
Made it through all that? Good! Ok, so now I have a list of posts that I can click through to from the index page.
I’ll explore a bit now with KitQL and detail what I get out of the box with the configuration I currently have.
Caching in KitQL
Alright, I have something of a project now where I can click a link on the index page to go to the post page.
If I pop open the browser console, do a page reload and take a look at the output I get this:
[KitQL Client] From: SSR,     Operation: KQL_AllPages
[KitQL Client] From: SSR,     Operation: KQL_AllPosts
KitQL is getting the data Server Side Rendered (SSR). For me before the page loads.
Now if hover the mouse over one of the READ → links I get this:
[KitQL Client] From: NETWORK, Operation: KQL_GetPost, Variables: {"slug":"technical-seo-with-graphcms"}KitQL has got the data from the NETWORK ready to go.
This is because of the sveltekit:prefetch in the a tag, this will
go off and run the load function in the [slug].svelte file. So
it’s loaded the data before I’ve clicked the link.
Clicking the link will take me to the page with the data already loaded. 🔥
This is a super snappy experience for the user.
Now, because I haven’t added a navbar yet (more on that soon), if I go to the browser ‘back’ button on the browser the console logs this out (on mouse hover):
[KitQL Client] From: CACHE, Operation: KQL_AllPostsKitQL is getting the data from the cache for the route. The index page loads up super fast!
There’s a widget!!!
One thing I found from a recent meetup talk from JYC is that there’s also a widget that is part of KitQL.
You can use it to display the store contents on the page with the KitQLInfo component that’s now part of the @kitql/all-in package.
So say I want to check out the contents of the KQL_AllPosts store,
in the index page I’ll import the component:
<script lang="ts" context="module">
  import { KQL_AllPosts } from '$lib/graphql/_kitql/graphqlStores'
  import { KitQLInfo } from '@kitql/all-in'
  export const load = async ({ fetch }) => {
    await KQL_AllPosts.queryLoad({ fetch })
    return {}
  }
</script>
Then I can use the component passing in the KQL_AllPosts store:
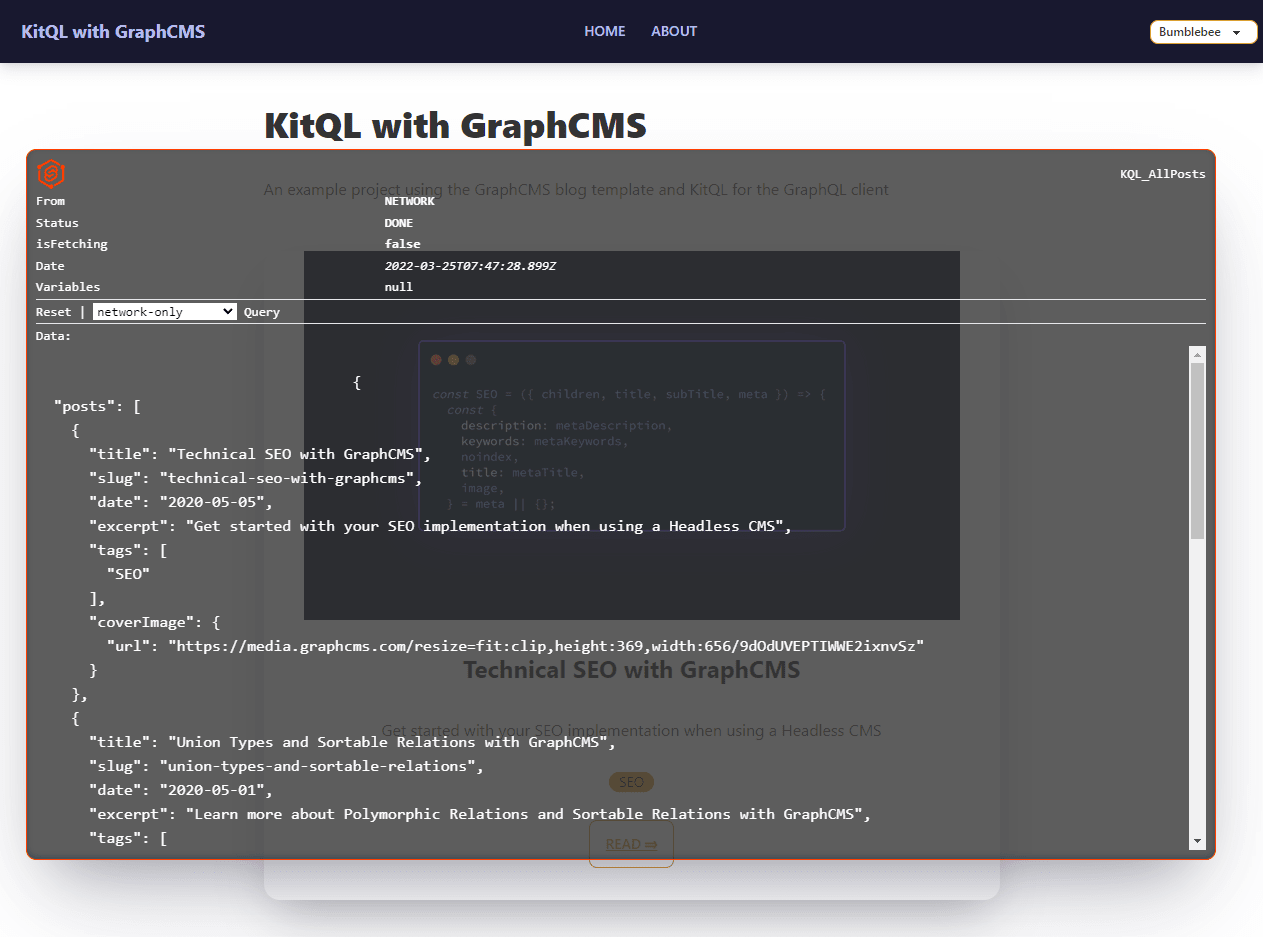
<KitQLInfo store={KQL_AllPosts} />Going over to the index page of the project now I can see the KitQLInfo component in it’s initial state:
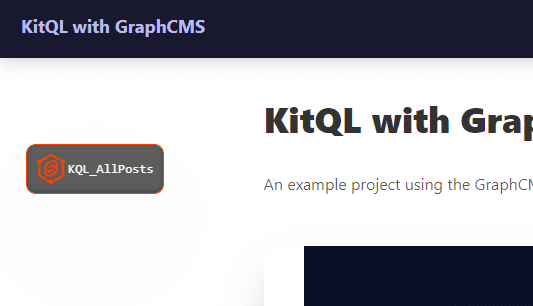
If I click on the store name in the component it expands out with the store data with options to reset the current store and options for where to query the data from:
Super neat!
Add in additional components
With the setup and configuration done now; along with querying data and passing variables to get specific data for a page route this post is effectively done!
The rest of this is just adding in the additional components I need to keep it in line with the rest of the examples for the differing clients.
So that’s a navbar, a footer and a theme switch.
There’s also an additional page src/routes/[slug].svelte file that
I’ll use for generating pages from the GraphCMS schema. It has a Pages model that can be used to create additional pages. Currently
there’s an about page but with the schema it allows content editors to
create new pages via GraphCMS.
The theme switch will need an additional package in the way of theme-change, I’ll install that now:
pnpm i -D theme-changeThen I’ll create the files needed for the navbar, footer, theme select and the page route:
mkdir src/lib/components
touch src/lib/components/{navbar.svelte,footer.svelte,theme-select.svelte}
touch src/routes/'[slug]'.svelte
# create query files for the page route
touch src/lib/graphql/{all-pages.gql,get-page.gql}
I’ll make the AllPages and GetPage queries for the page route and
add the code to the all-pages.gql and get-page.gql files.
All pages first:
query AllPages {
  pages {
    title
    slug
    content {
      html
    }
  }
}
Then the get page query:
query GetPage($slug: String!) {
  page(where: { slug: $slug }) {
    title
    content {
      html
    }
  }
}
Next up I’ll add the markup to the theme switch component, this is a list of all the available themes in daisyUI:
The footer, this is taken straight from the daisyUI examples nothing of note here, aesthetics only:
Before I tackle the navbar, I’ll need to implement the theme change
feature in the __layout.svelte file. I’m also querying all pages so
I can pass that to the navbar and it can generate links from the
result of that query:
The navbar is expecting a pages prop, which is the result of the AllPages query from KitQL.
There’s a Svelte each loop in there to create the page name and link for anything being passed into the component.
Lastly I’ll add in the src/routes/[slug].svelte file markup!
That’s it, I have a sweet looking, basic project now!
Conclusion
KitQL is an awesome bit of, ahem, kit!
With all the GraphQL Code Generator plugins added this gives you code
intellisense superpowers with VS Code in your SvelteKit project. All
packaged up for you in one dependency in the @kitql/all-in package.
This makes working though GraphQL queries in your SvelteKit projects a joy!
I’ve already linked the resources but will put them here for ease of access:
- Follow JYC on Twitter for daily updates on the KitQL project
- KitQL Docs
- Explainer video by JYC
- KitQL All In
You can check out the source code on GitHub for this post.
Thanks!
There's a reactions leaderboard you can check out too.